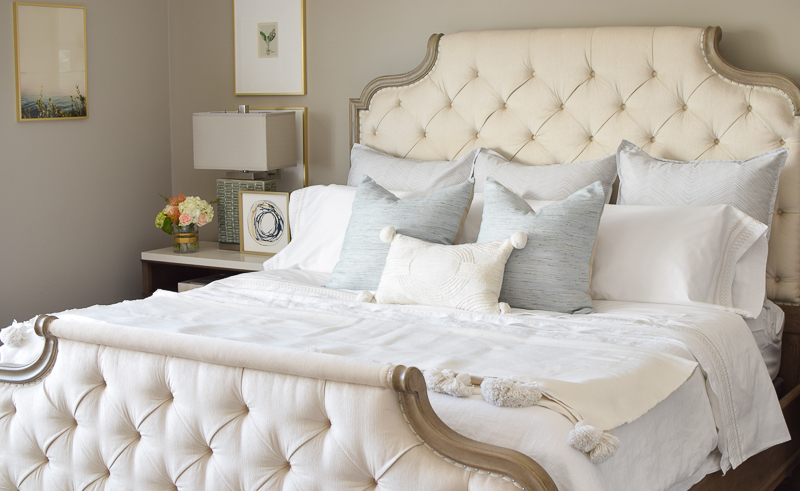
Making a bed properly is a lifelong skill that everyone needs to know. At least, it’s a great way to start your day knowing you have accomplished one little task. Also coming home to a nicely-made bed is like the perfect welcome home sight after a hectic day and helps you relax.
Making your bed is essentially the same as getting yourself dressed. You start with something underneath then layer on the basics – i.e. the sheets, pillows and comforter. Lastly, you can accessorize with decorative pillows.
Step 1: Protect and cover your mattress
You may not need to put it on every time you make your bed, but using a mattress protector can help extend the life of your mattress by preventing stains from spills and damage from wear and tear. It’s also a good idea to use pillow protectors so you won’t need to wash your pillows as often. These protectors are especially important for anyone with allergies because the fabric blocks household allergens from settling into your pillows and mattress.
You can also add a mattress pad (which goes on like a fitted sheet) or a mattress topper (which sits on top of the bed) to increase the comfort or support of your mattress. If you want to use a bed skirt for decorative purposes, you’ll need to place it underneath the mattress first.
Step 2: Add the bed sheets
The right sheet set can make all the difference in a comfy bed; after all, it directly touches your skin all night long. First, place the fitted sheet over your mattress and any of its toppers, making sure all four corners are tucked in well.
Next up: the top sheet (though the top sheet is optional). Here’s how to make it look neat so it doesn’t stick out:
First, lay the sheet across your bed with the top fabric facing down — that means if there’s a pattern on the sheet, the dull side should be face-up so that it’s visible when you turn down your sheets! The sheet should be centered with the sides evenly hanging over the edges of the mattress.
Next, create hospital corners. First, tuck the sheet under the mattress along the foot of the bed. At the right corner, lift the hanging side of the sheet up and lay it on your bed. There will be an extra flap of fabric hanging down; tuck that piece under the mattress. Fold the side down again and tuck it under. Repeat this step on the other side for a nice, tightly-made bed.
Step 3: Layer on your covers
This is where you add your comforter, duvet, quilt, or any preferred cover. It’s the most visible part of your bed, so make sure you love the design if you’re using a duvet cover! Lay your bed cover out over your sheets so the sides are evenly hanging over the edges.
At the top of the bed, fold down the comforter to leave enough space for your pillows. You can also fold down the top sheet for a layered look. And if the sheet is wrinkled, you can iron just the visible portion.
Step 4: Place your pillows
First, put on the pillows you actually use: These will sit against your headboard. You can use the pillowcases that comes with your sheet set, but for an extra luxurious bed, you can opt for a silk pillowcase: it feels great and helps reduce bedhead and facial creases. Next, add on shams, which are pillows that are more decorative than functional and usually match the comforter.
Step 5: Add on throw pillows
For the best-looking bed, add additional throw pillows or shams. Feel free to mix and match here – this final step is all about appearance and preference. You can choose from an assortment of square, oblong, or rolled pillows in coordinating fabrics. Five (decorative pillows) is the ideal number for your bed to look full, but not too full.
You can also add a throw blanket at the foot of the bed. To make it look neat, fold it horizontally like a fan. This also makes it easier to pull it up into position when you need extra warmth at night.
Source: Goodhousekeeping.com


